FinKoper now has a section with the Photo of the Workday!
Thus, employees can automatically record the working time spent on a task, using a timer inside the task. And a leader of an Accounting firm has access to detailed analytics for each employee and for each customer.
Features for employees
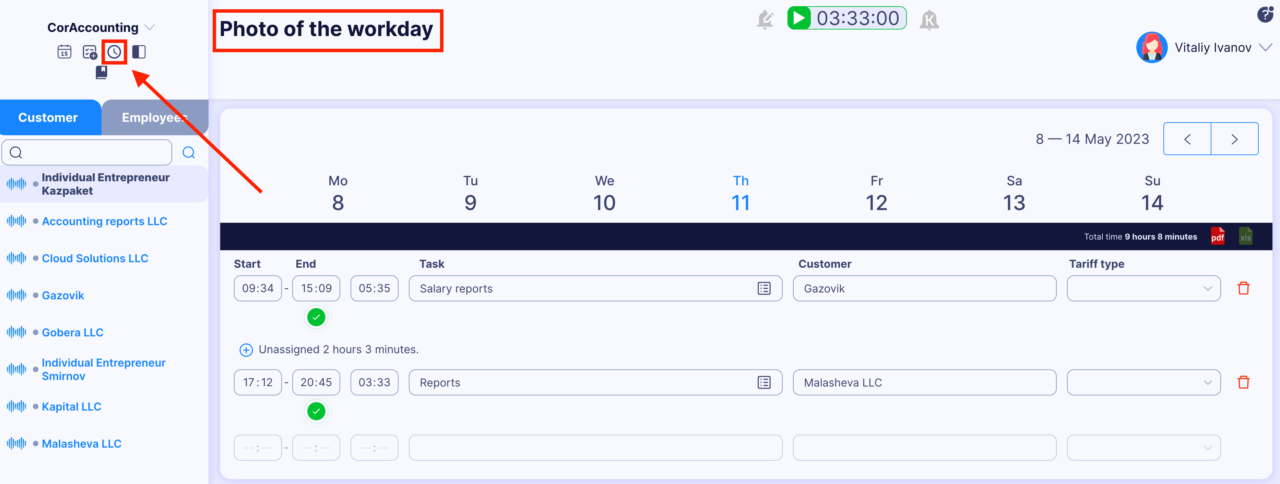
Any company employee can record the working time in the Photo of the Workday section.
The Photo of the Workday section is in the working window’s upper left corner.

There are two ways to enter a task in the Photo of the Workday:
- Automatically entering a task via Timing. When a responsible employee activates the “timer” button, the task is automatically recorded in the Photo of the Workday. Just remember to turn off the timer after it is done. If an employee interrupts and goes to another task, the timer saves the value before the interruption;
- Manual addition. In this case, you need to enter the Photo of the Workday section and specify: the start time, end time, customer, and task name (or additional fields that will be specified in the settings by the Administrator).
Adding tasks by the timer (configurable in the task itself)

Adding a task manually (configurable in the Photo of the Workday section)

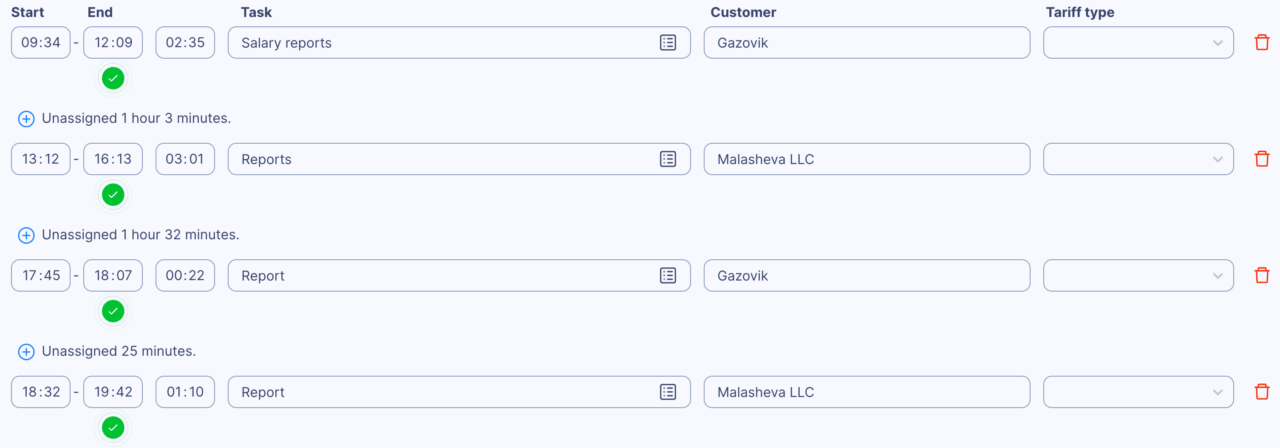
After completing all the tasks in either of the two ways, the Photo of the Workday section will look something like this:

It is also possible to add manual tasks for previous days or edit an existing task. In addition, you can export the Photo of the Workday to a PDF file.
Features for a leader
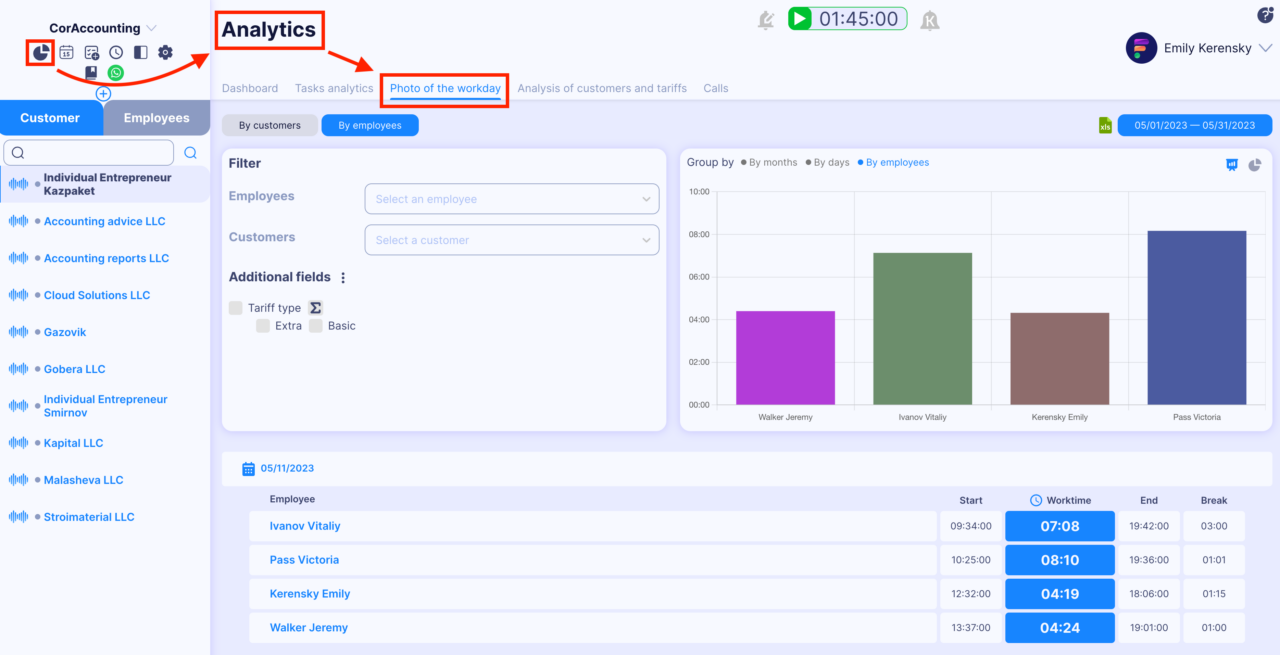
A separate section with analytics ([Analytics] —> [Photo of the workday]) is implemented for the manager, where detailed information is available in two subsections: by employees and by customers. Each subsection displays a visual graph, and you can also set filters to display the appropriate diagram.


Subsection: By employees

Subsection: By customers

This functionality will help to effectively track the work of accountants, as well as the time spent on a particular task by a particular employee for a particular customer.
Additional fields
Also, a manager of an Accounting firm can set up additional fields that will be filled manually by employees if necessary. That is when filling out a task in the Photo of the Workday, employees can set up not only the default fields (start time, end time, client and task name) but also additional parameters.
For example, the manager wants employees to specify an additional field — “Tariff type” — when entering the task in the Photo of the Workday. To do this, the manager needs to go to [Account Settings] —> [Task Settings] —> [Photo of the Workday Settings] and add an additional field “Tariff Type” and values for it — “Basic” and “Extra” (this is an example, you can use any other fields and values).

After the manager adds this field, all employees will be able to fill it out in the Photo of the Workday section. That is, in addition to the default fields (start time, end time, client and task name) there is also a field “Tariff type” with two values “Basic” and “Extra”.
That is, each employee in the Photo of the Workday section has a new parameter to choose “Tariff type”:

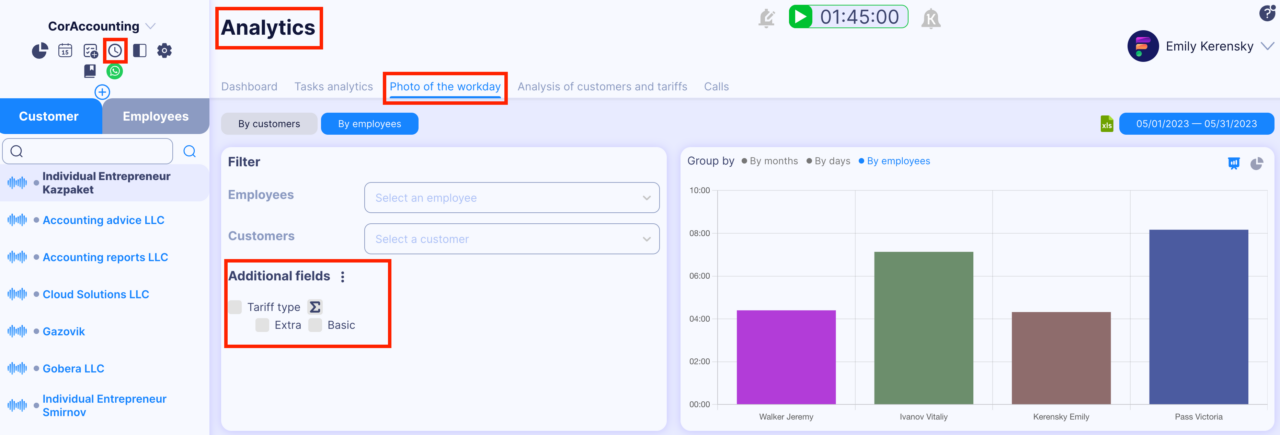
Moreover, all information on additional fields is available in the analytics for the manager.
After adjusting the additional fields, there are new filters for plotting graphs.

This functionality will help employees create a more detailed report on the tasks, and the manager will help keep track of every parameter that will be needed for analytics.
Have a great day at work!

